Deploy IIS site with Azure Devops


Azure Devops has useful capabilities that allow you to deploy your web application for IIS to your on premises app server, VM or an Azure VM if you choose. It brings more modern deployment processes for legacy IIS applications you may have into your workflow and remove those manual steps that are more of a dark art that only one developer on your team knows!!. For the Azure context in this blog, this will be a web app deployment under an IaaS model (an Azure VM which we can control and configure ourselves) and this is different to deploying to Azure App Service and should not be confused here.
Publish Artifact to Azure Artifacts
We will take a look at how this is configured in a few steps that get us to deployment quickly. To save time, we are going to immediately supply an Artifact in Azure Artifacts and we will be skipping creating an Azure Devops Build pipeline in this blog. Instead we publish a Universal Artifact Package direct to the Azure Artifacts repository with the following commands in a Command prompt (I will assume you have the Azure CLI installed already):
az loginLogin into Azure with your credentials
Next build and publish your Web App project to a local folder (Right-click on project and Publish in Visual Studio). In this blog, I will be publishing just a lightly modified version of the boiler-plate ASP.NET Core Web project we get in Visual Studio for quick demo purposes.
Navigate to your publish folder in the CMD window, then execute the following command:
az artifacts universal publish --organization https://dev.azure.com/{yourOrganisationName}/ --feed {yourdevopsProjectOrFeed} --name testazureartifact --version 0.0.1 --description "Welcome to Universal Packages" --path .Upload your publish files as a Universal Package to Azure Artifacts
You should now have your Artifact in the Artifacts section in Azure Devops that you would have otherwise typically built from a Build pipeline. With a Universal Package deployment you should see something like the following in the Artifacts section:

Set Deployment Group in Azure Devops
We then have to make sure that we have our target machine setup and recognised as part of a deployment group within Azure Devops. To do this, go to Pipelines>Deployment Groups>New , Set a Deployment group name and Description then select Create.
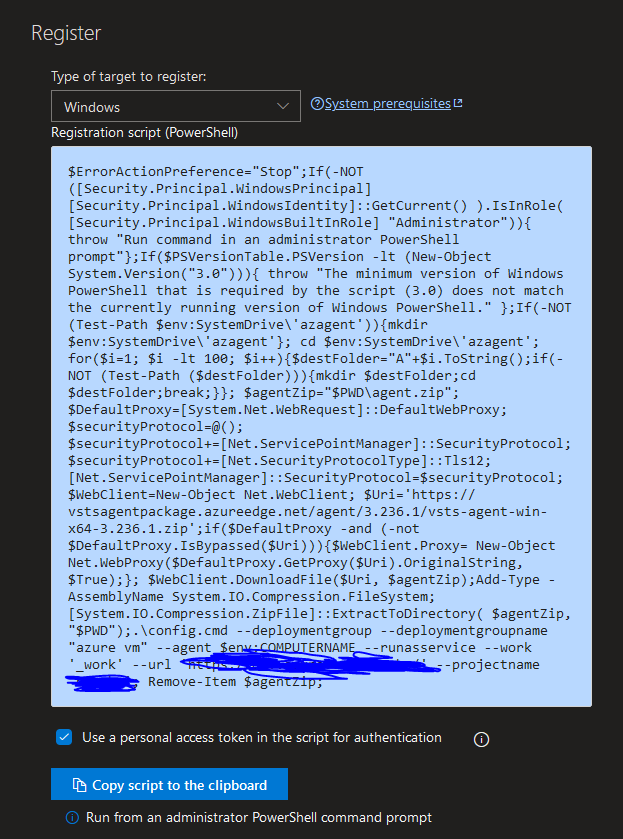
You will get a Powershell script displayed to you. Select your Target OS (I'm using Windows for my target server), check 'Use a Personal Access Token in the script for authentication', then Copy the script to your clipboard:
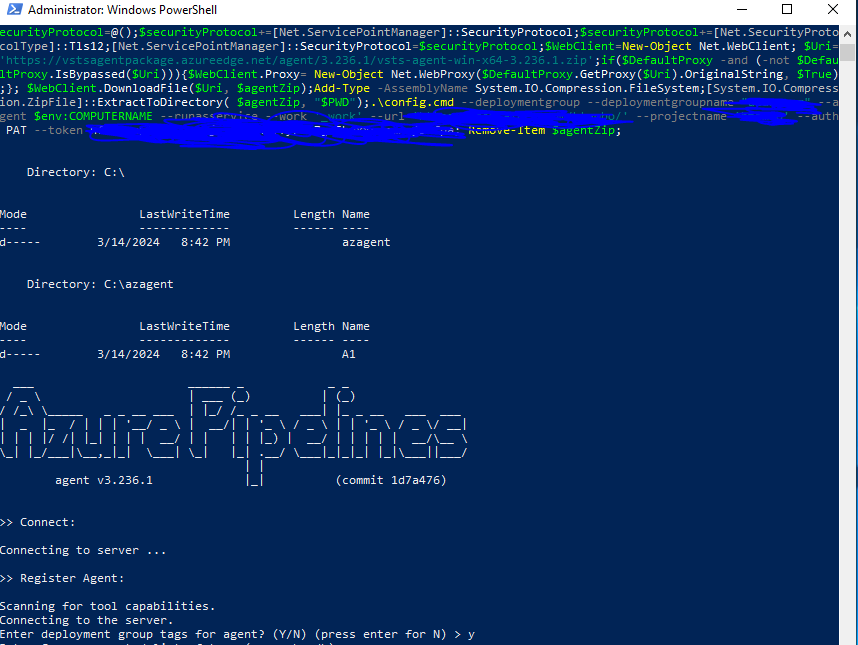
With the script ready, we will use it to install the Azure Pipeline Agent Service on our Virtual Machine or on-premises Server, which will run as a Windows Service (or Linux daemon on Linux) to orchestrate communication between the VM/Server and Azure Devops. Open an Administrative PowerShell window on the target machine, paste your script and Enter to run. You should see something like the following:
Make sure the 'Azure Pipelines Agent' service is running in Windows Services under Start>Services:
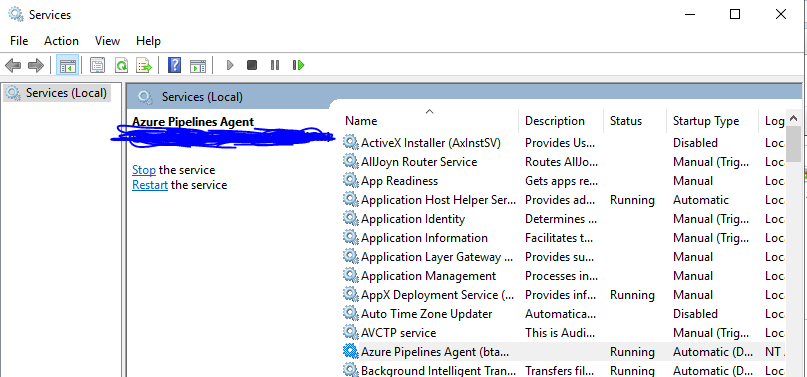
This Windows Service must always be running or set to run upon Server restarts to avoid disruptions in the pipeline. Once the service is verified to be running, you can check back in your Deployment Groups Section in Azure Devops to make sure sure the machine is marked as online in Devops (Refresh the page if not yet online). Here is mine:

Set IIS site Release pipeline in Azure Devops
We can now create the Release Pipeline by navigating to Pipelines>Releases>New>New Release Pipeline. On the Template Wizard, search for 'IIS'. In this demo we will take a look at a simple ASP.NET Core Website, so we choose 'IIS website deployment' and click Apply.
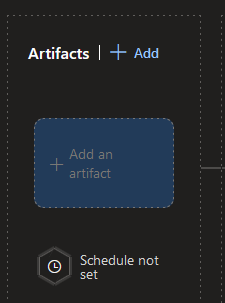
Next, select 'Add an artifact':
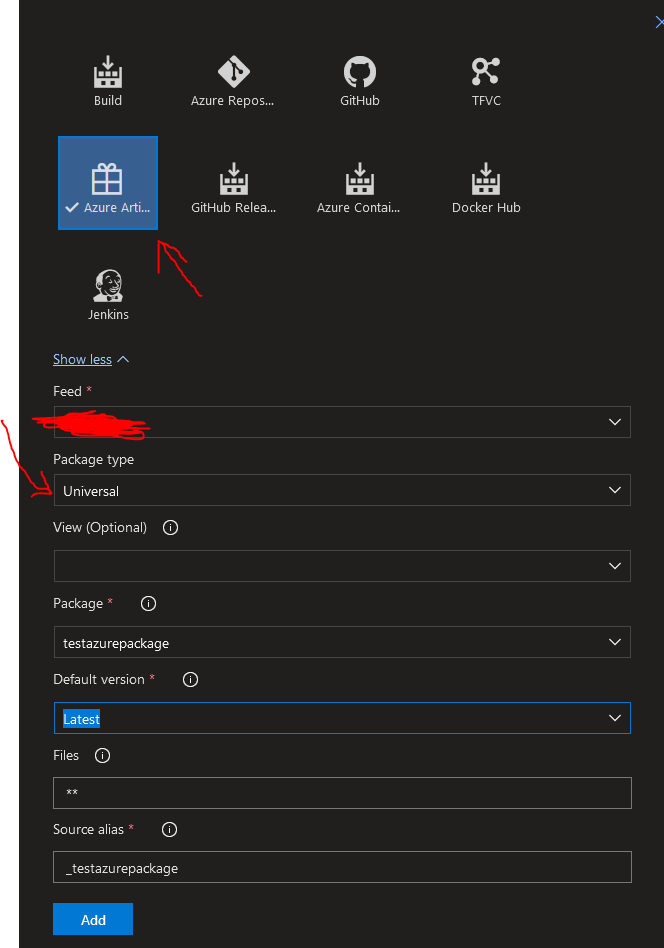
Now, we can choose the artifact from Azure Artifacts directly, by choosing the Azure Artifacts target (under show more Artifact types and making sure that the Package type is Universal in this case). Choose your desired package which should appear in the Package dropdown and set an Alias for it:
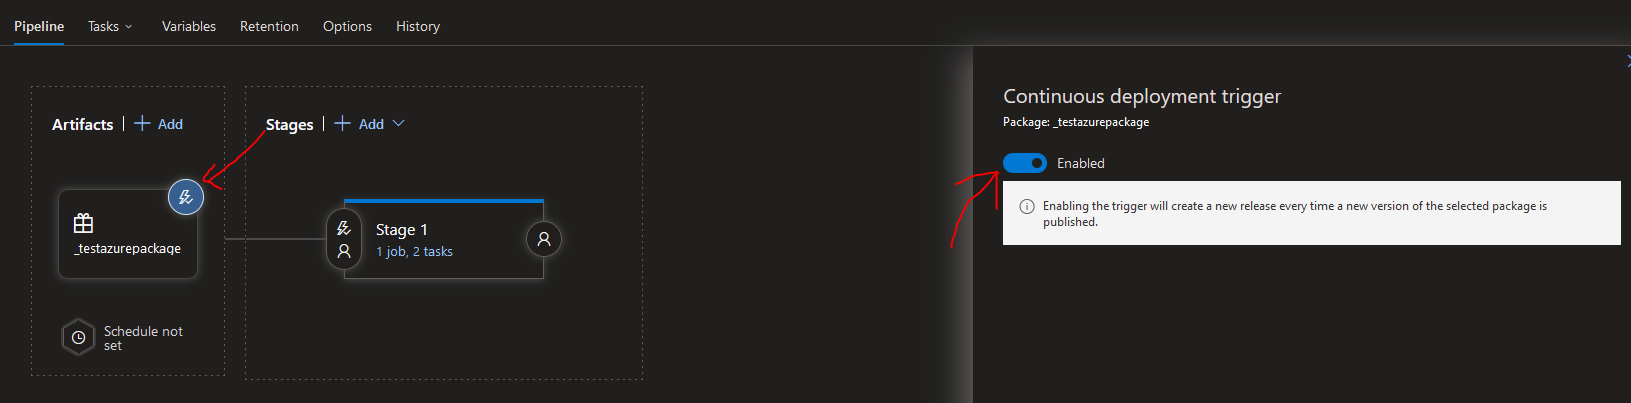
After clicking Add, Click the Lightning Icon on the Artifact you have just chosen and Enable Continuous Deployment. This will allow the Release pipeline to trigger as soon as the Artifcact is updated with a new version:
Save your changes. Now Proceed to Edit the Tasks in the Tasks tab (ort click the first Stage to Edit).
The first Item to edit is the Deployment process itself. Click on 'Stage 1' at the top, and Se
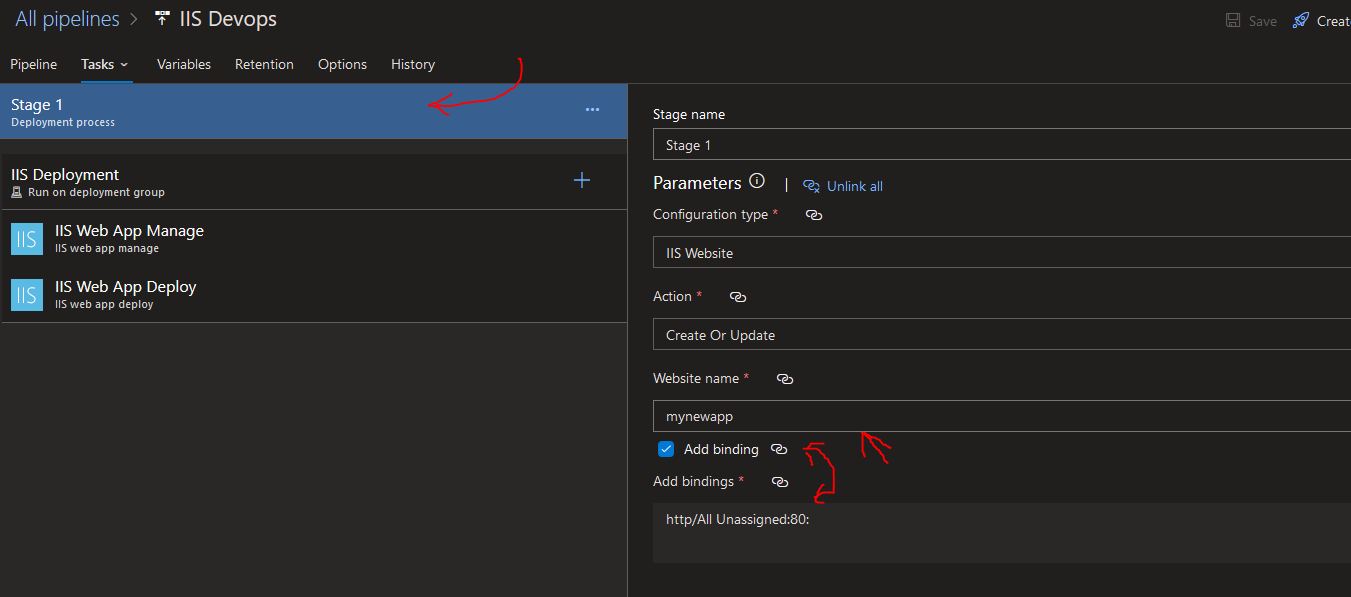
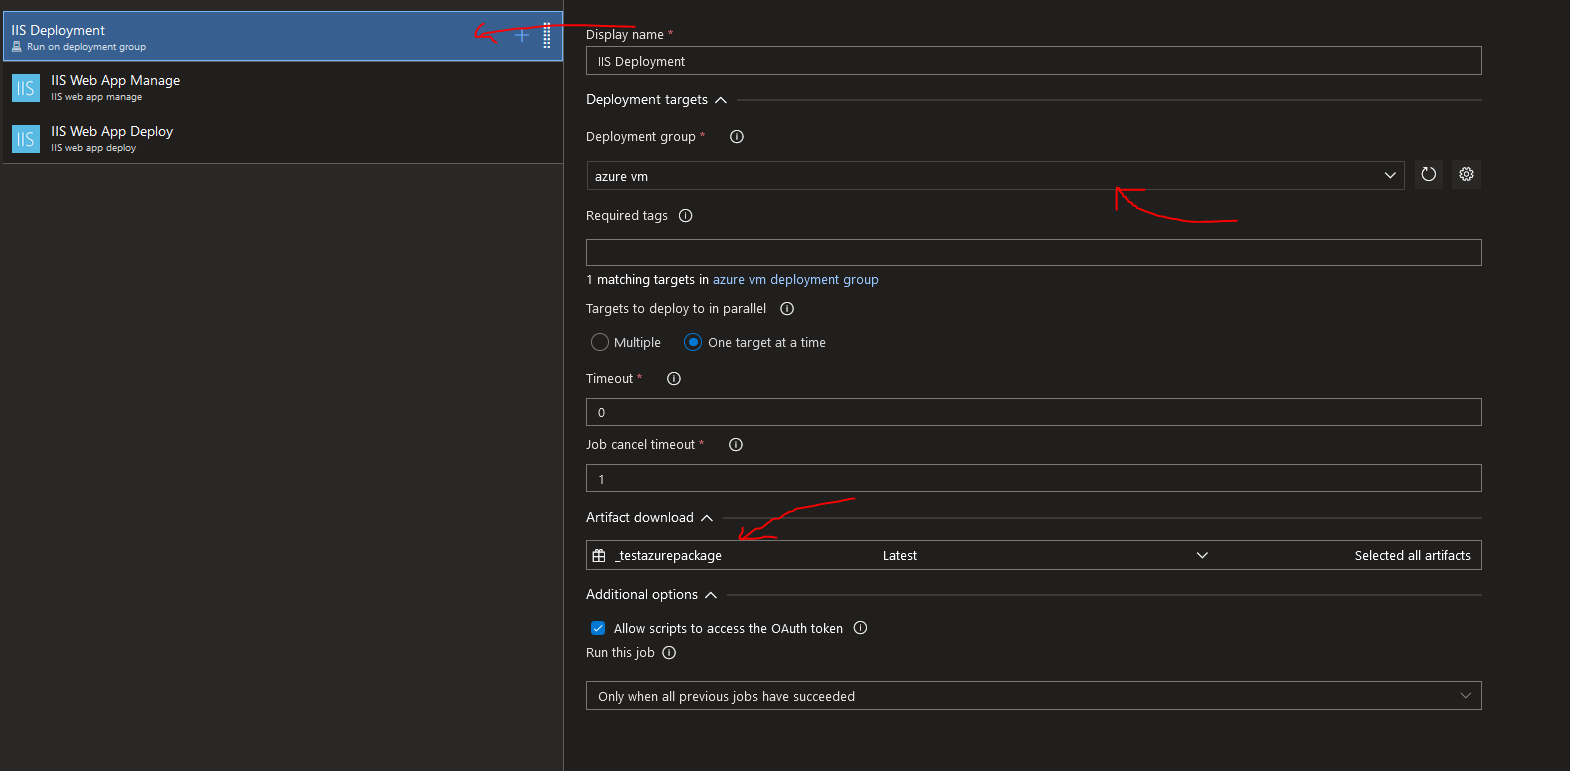
Next, Under the Deployment group job labelled 'IIS Deployment', select where you want to deploy to from the Deployment group dropdown, and make sure your artifact is selected like the following:
Next, in the IIS web app manage Task, set the Website Name, the Physical path on the target, whether an AppPool is to be created or updated
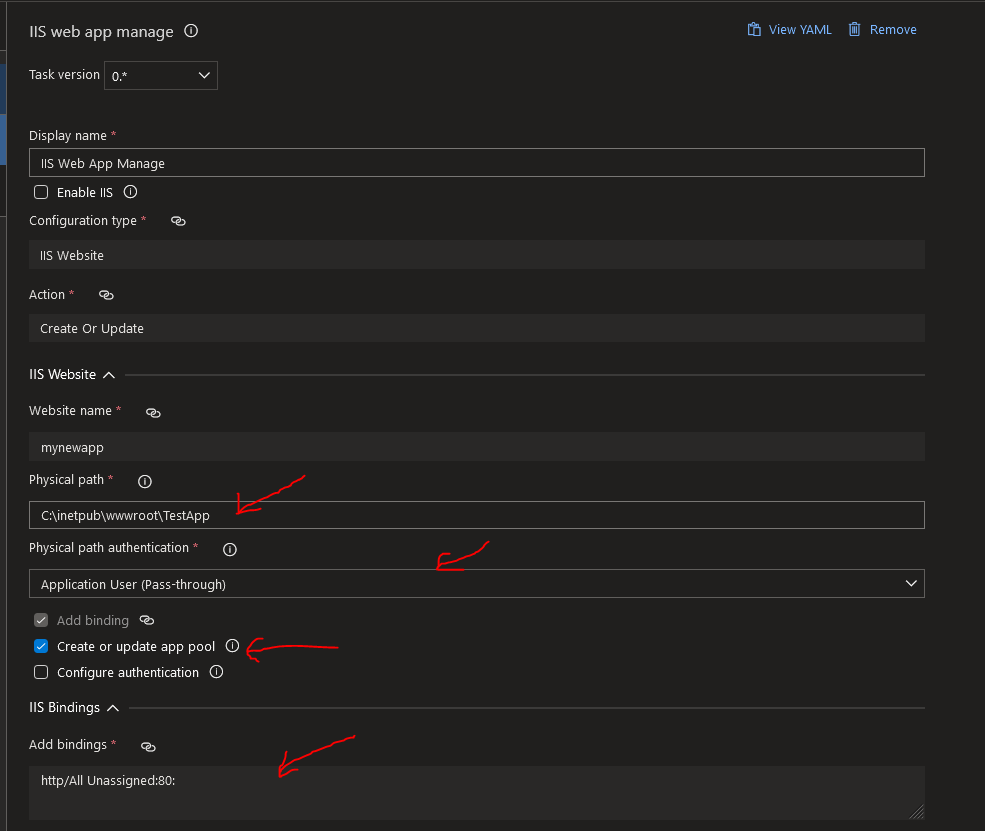
If Creating an AppPool, there will be further configuration on scrolling down further still on the 'IIS Web App Manage Task'. If setting a Custom Account User and Password for the AppPool authentication, you can set the Password here directly but try to avoid that. Instead use a Task Variable as seen below which you can read on how do that quickly from my blog post here (doing so prevents sensitive items like passwords being printed in logs in plaintext when we run the pipeline). Continue as follows:
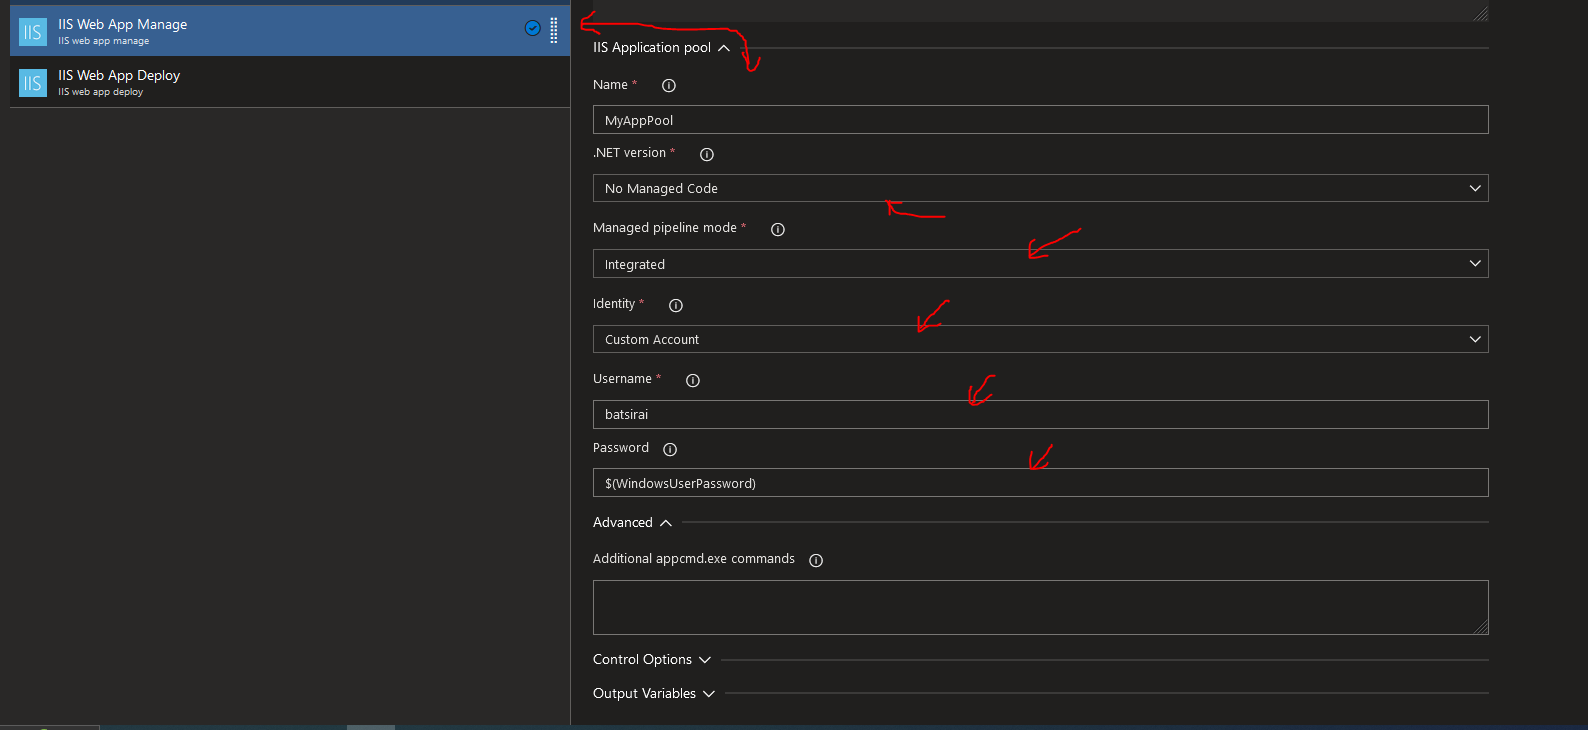
Next, in the 'IIS Web App Deploy', make sure you have selected the right package (the Universal Package), and any other relevant settings for your Web App:

That's it!!! Click Save and add a Comment if you like.
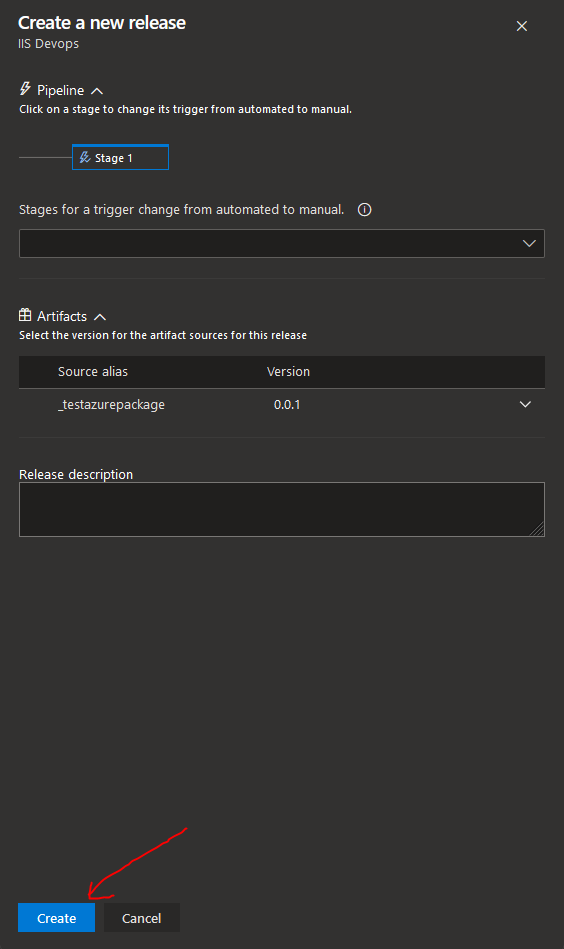
Then click 'Create Release' , Set a release comment if you wish and click Create:
Result
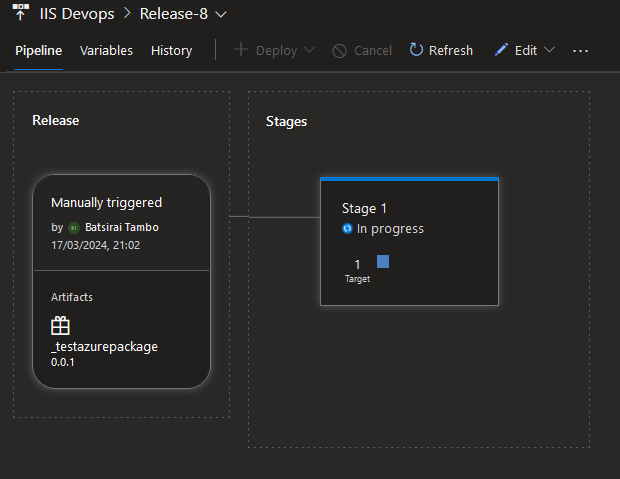
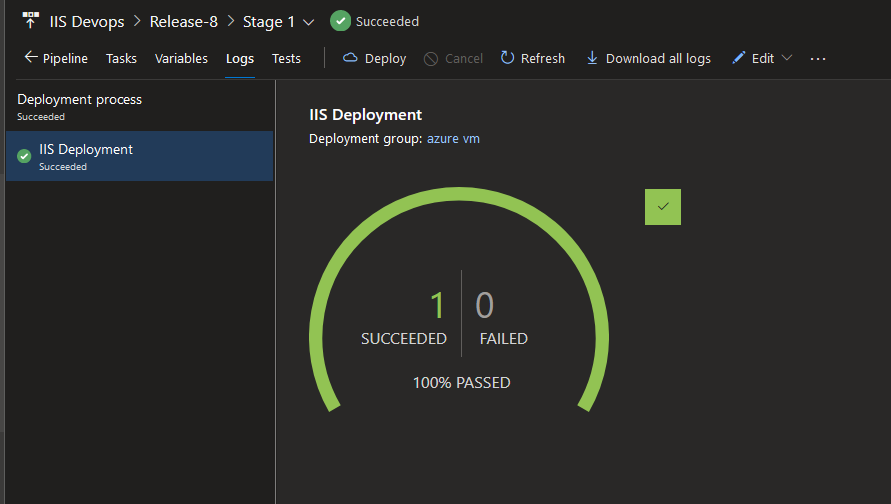
The deployment begins to your target machine. You can view what is happening by clicking on the Release id/number:
Clicking into the deployment stage (Stage 1), you should see the Success wheel with 0|0 in blue, then it should succeed after a few moments:
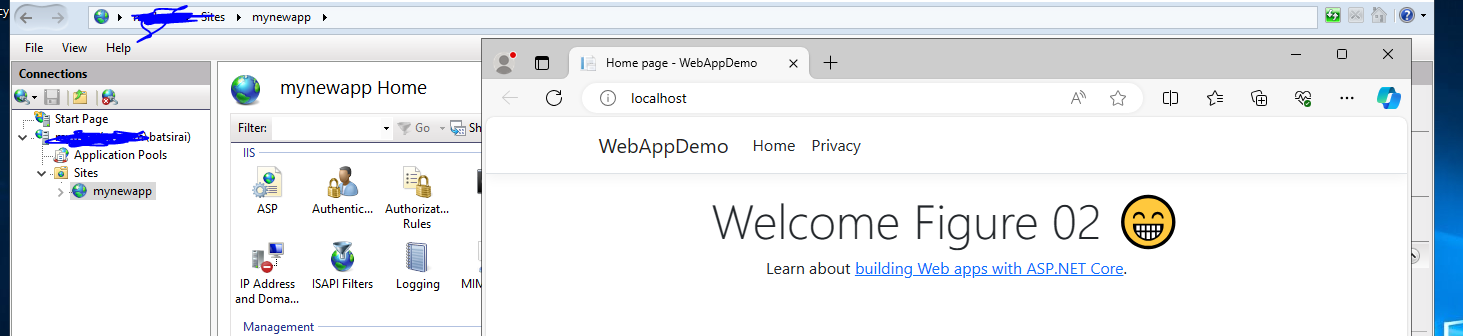
We can hop on over to the the server/VM or Azure VM, and checking in IIS we should see that our web app has been added and browsing into our application from IIS lands us on the Home page!!!
Some Concluding notes
On this particular Azure VM, please note that I opted to manually Enable IIS from the Server configuration and I manually installed the NET 8 Runtime (Enabling ASP.NET Core is not enough, that is just the hosting bundle!!).