Deploy Windows Service using Azure Devops


Windows Services built on .NET Core and classic .NET Framework can be deployed and automatically run using Azure Devops to our target machine(s), removing the need for manually copying files around.
You will have the following ready:
- A working Azure Devops account
- Your working Windows Service code committed in Azure Repos
- A target Windows machine to deploy to with an internet connection that you have access to. This material will work on Virtual Machines on your premises or in Azure, or even any other physical machine you can access
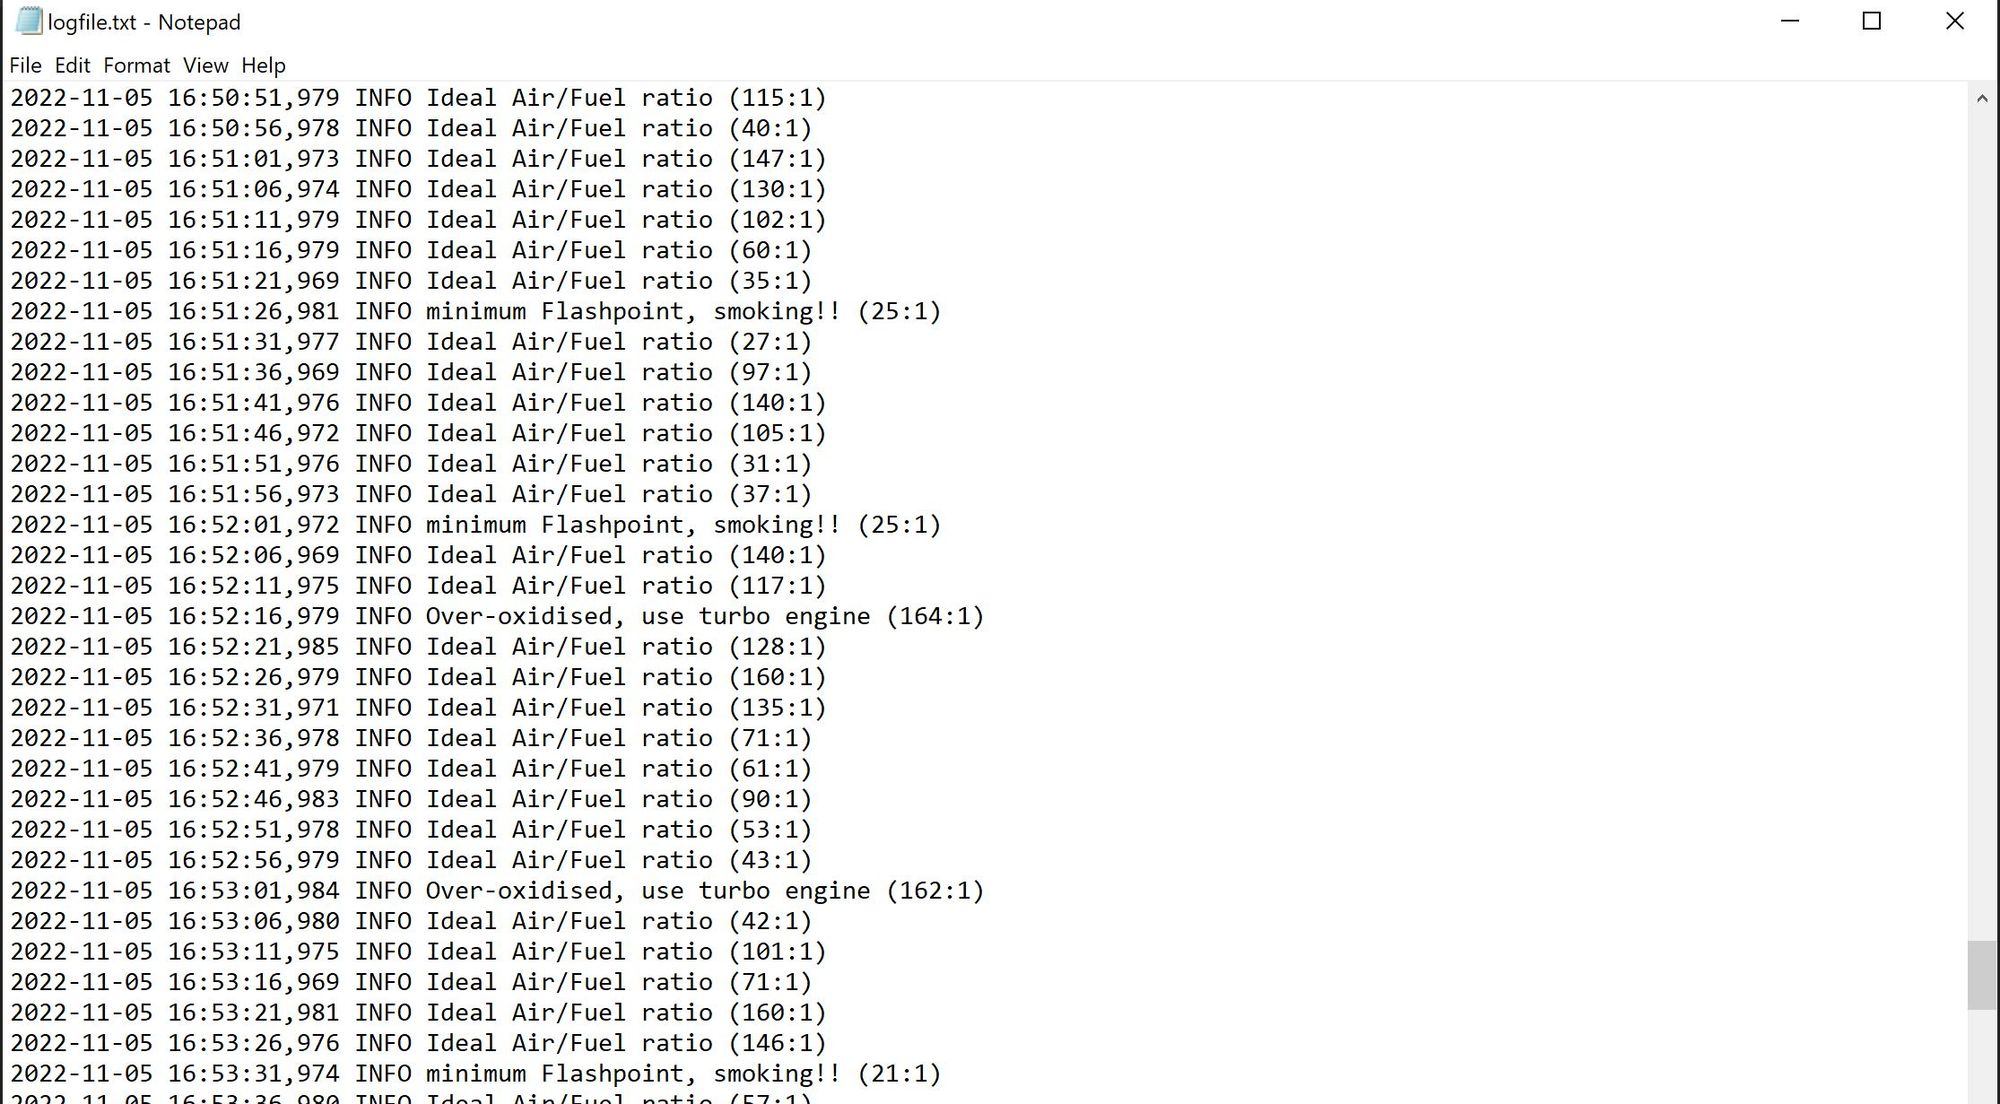
In my case, I originally used a .NET6 (now upgraded to .NET8) Windows Service that leverages TopShelf, that simply logs a calculated value to a log file continuously every 5 seconds. Although we'll be focusing on the Devops side of things in this post, I added the 3 files for my simple NET8 Windows Service should you wish to reuse for simplicity at the very end of this post.
Create a Build Pipeline
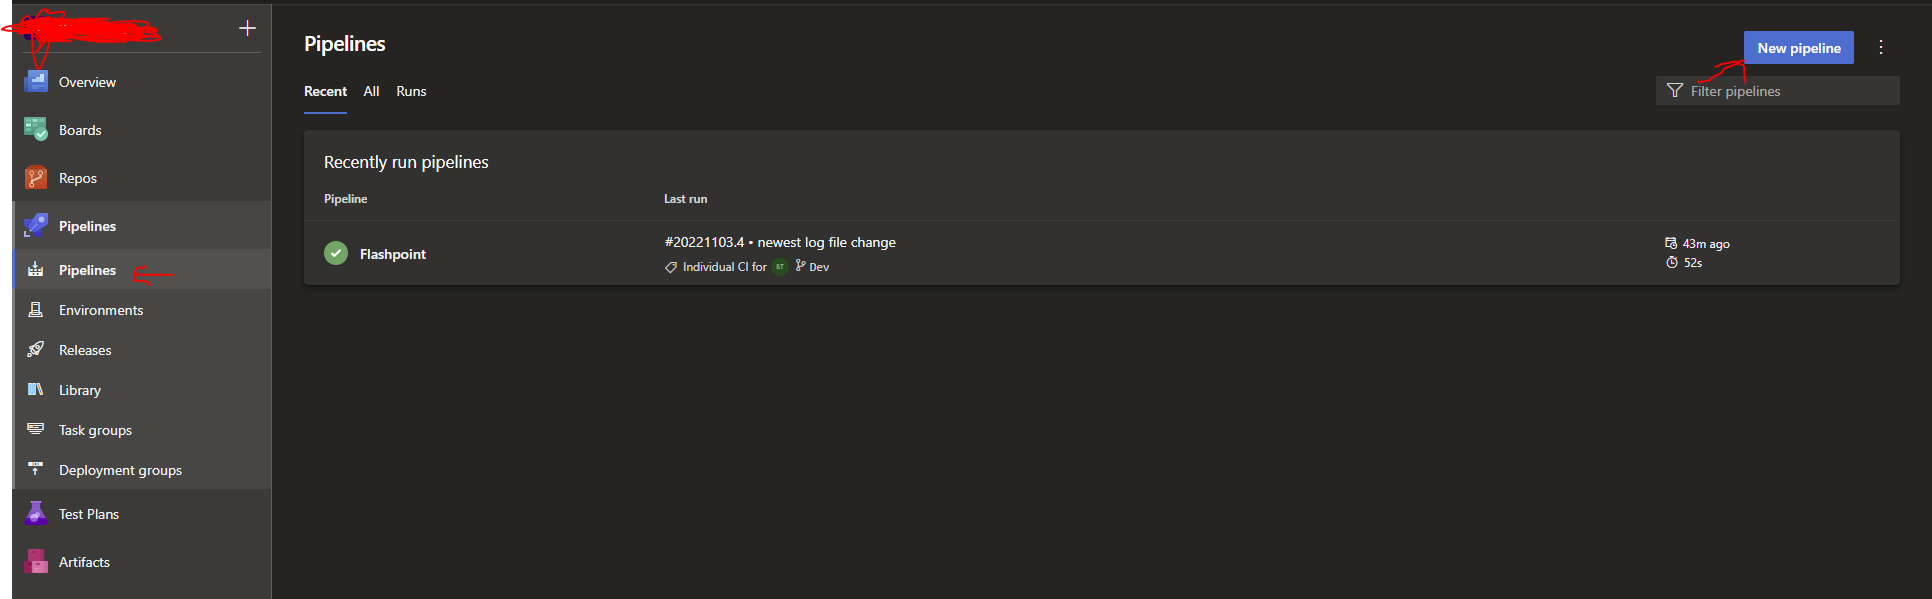
In Azure Devops, with your code already in Azure Repos, from the left hand menu, go to Pipelines->pipelines , then New Pipeline to create your Build Pipeline:
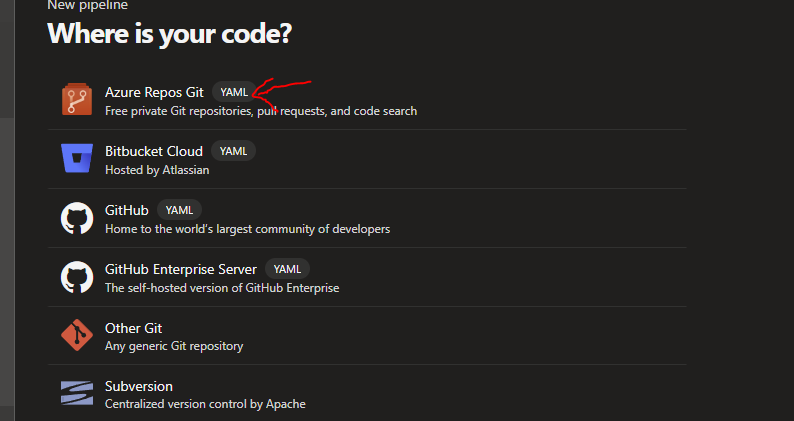
On the next screen choose Azure Repos Git (or relevant source. I'm using Azure Repos):
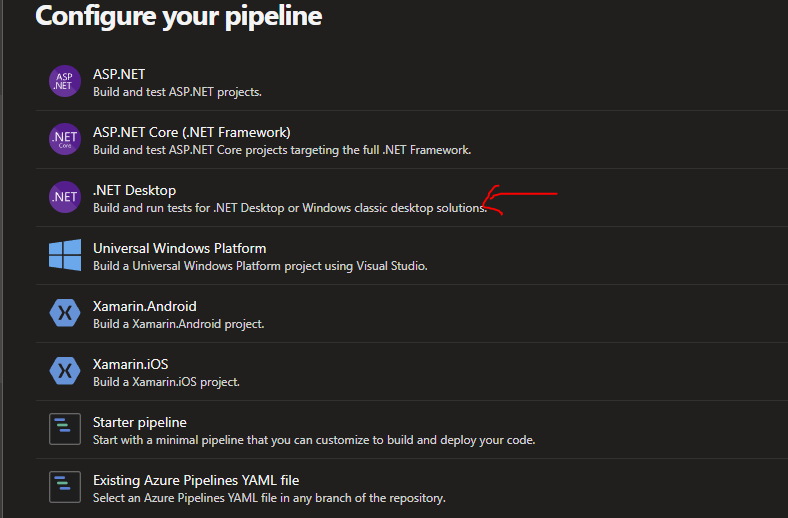
Choose your Repo for your Project, then choose '.NET Desktop' as the YAML Template to start with. This will be relevant for both .NET Core and .NET Framework Windows Apps:
You will then see a default YAML file describing how to build a .NET Desktop app which is our Windows Service. Feel free to remove the default VSBuild Task and the default VSTest Task. Then add in the following Tasks after 'steps:'. The end result of these tasks is that we get an Artifact that we can use for deployment later on:
##Add these tasks after 'steps:'

##if using .NET7 or .NET8 for your project, add this task if
##your build agent does not have .NET7/.NET8 yet or you have issues with .NET7/.NET8.
##if using NET Framework then this Task is not needed

- task: UseDotNet@2
  displayName: 'Use .NET Core sdk'
  inputs:
    packageType: sdk
    version: 8.x
    installationPath: $(Agent.ToolsDirectory)/dotnet

#############

###Installs Nuget tool and restores solution
- task: NuGetToolInstaller@1

- task: NuGetCommand@2
  inputs:
    restoreSolution: '$(solution)'

##Remove the default VSBuild@1 Task and VSTest@2 Task

##This will build the solution and add the files to an output path within the
##build's Bin Directory in Azure Devops

- task: VSBuild@1
  inputs:
    solution: '$(solution)'
    msbuildArgs: '/p:OutputPath="$(Build.BinariesDirectory)\$(Build.BuildId)"'
    platform: '$(buildPlatform)'
    configuration: '$(buildConfiguration)'

##This will create a single zip file identified by the
##BuildId from the bin files

- task: ArchiveFiles@2
  inputs:
    rootFolderOrFile: '$(Build.BinariesDirectory)\$(Build.BuildId)'
    includeRootFolder: false
    archiveType: 'zip'
    archiveFile: '$(Build.ArtifactStagingDirectory)/$(Build.BuildId).zip'
    replaceExistingArchive: true

##This creates a Publish Artifact or 'package' that wraps the above zip file
##and can be manipulated and understood by Azure Devops as a deployable
##artifact, adds it to the build's ArtifactsStagingDirectory. The
##default name is called 'drop' but you can change it to something else

- task: PublishBuildArtifacts@1
  inputs:
    PathtoPublish: '$(Build.ArtifactStagingDirectory)'
    ArtifactName: 'drop'
    publishLocation: 'Container'
After adding the Tasks above, Click Save and Run. This build should succeed and produce the Artifact we will use later.
Specify target machine(s) with Deployment Groups
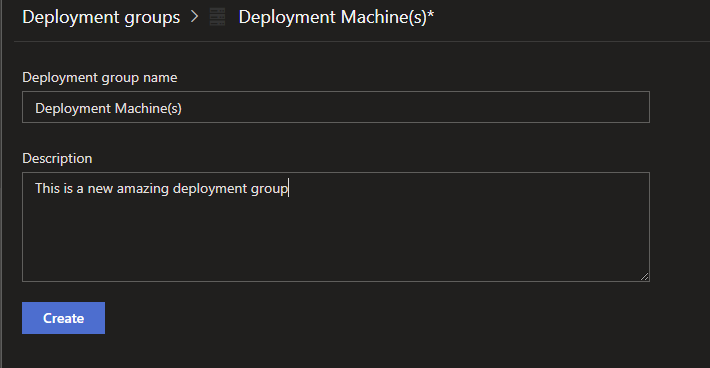
Now we need to specify our deployment target. Go to Deployment Groups and then New:

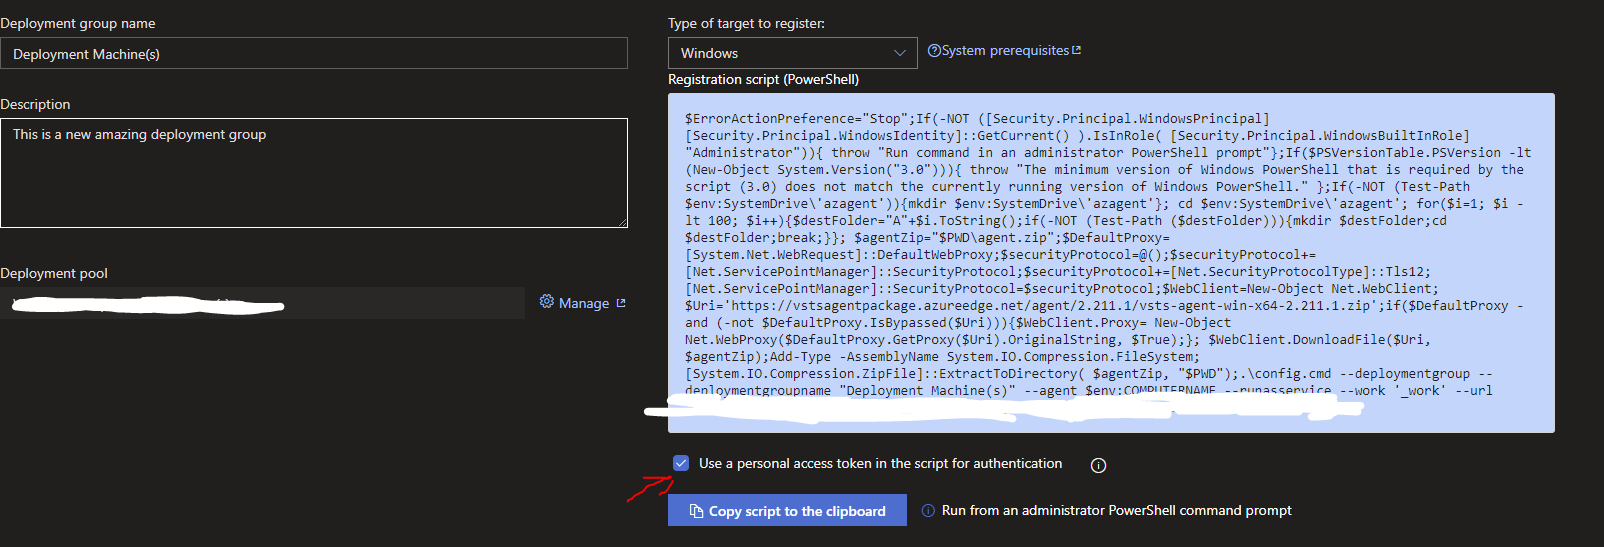
Give your deployment group a Name and description and click Create:
On the next screen, you will be presented with a PowerShell script to execute on your target machine. Click on Use a Personal access token, then Click Copy to clipboard:
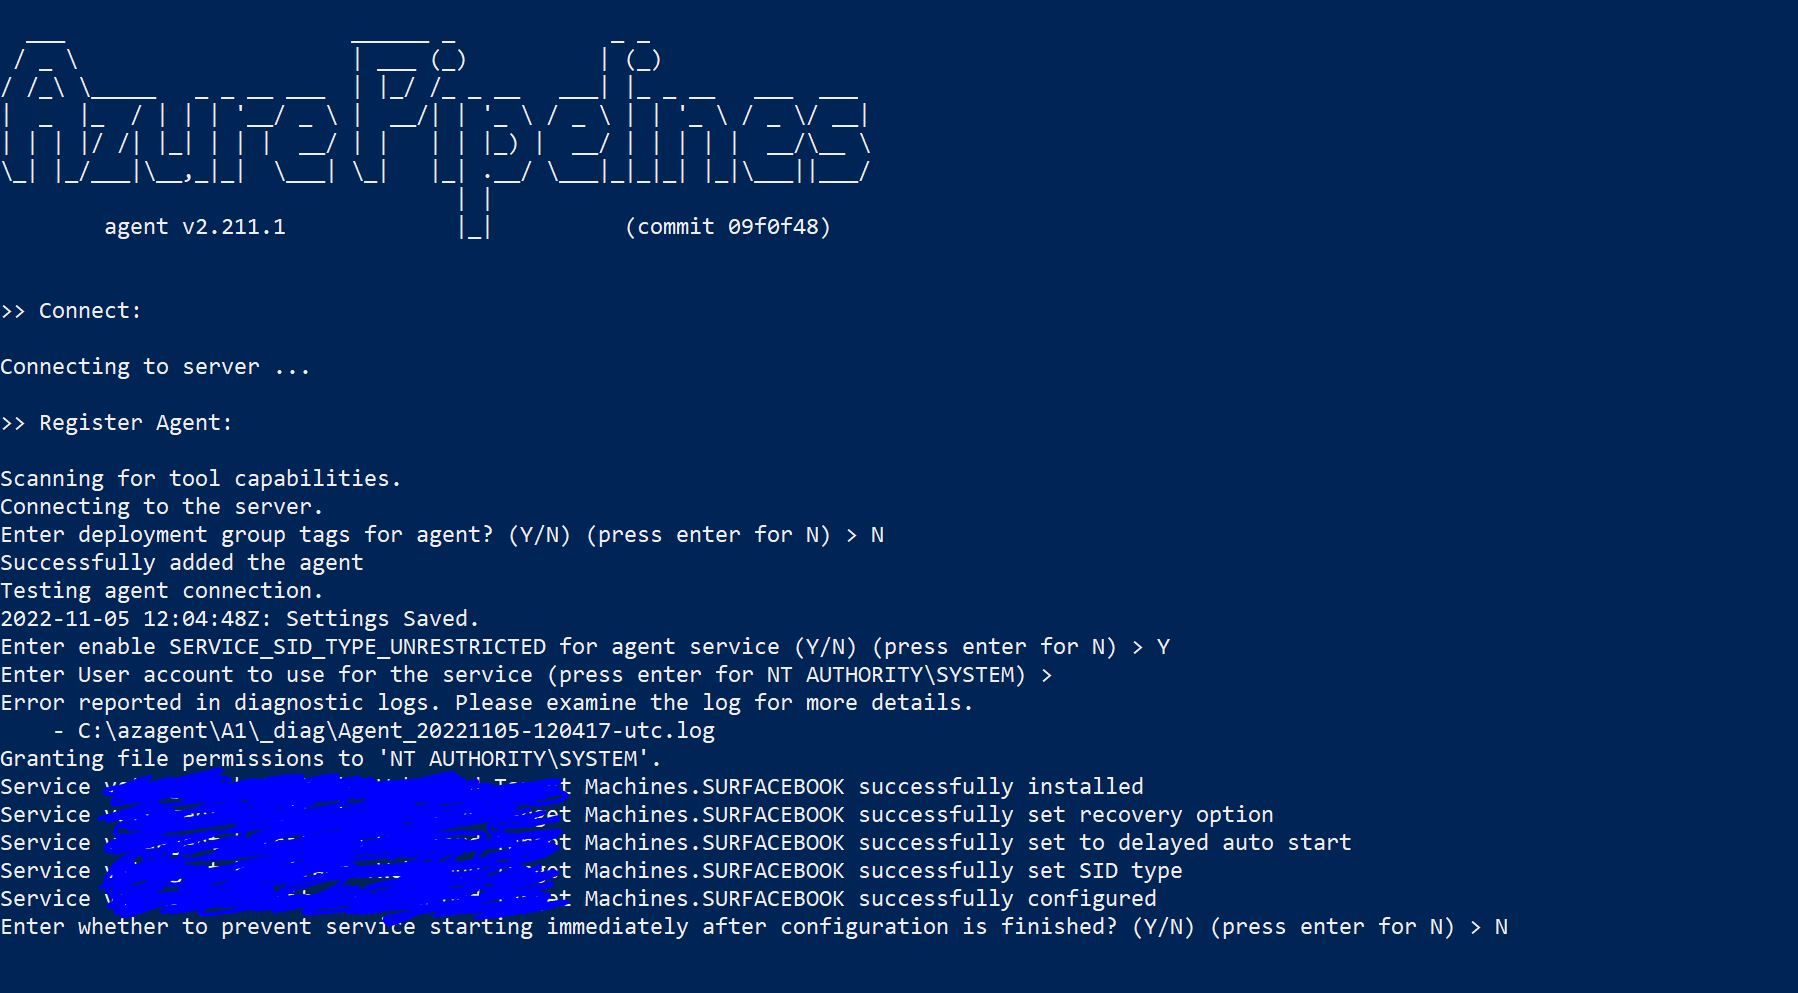
Now go to your target machine, Open an Administrator-privileged Powershell command prompt, paste your script and then execute. This will take a while, maybe 2 to 5 minutes. You should see something like the following if all is well, indicating that the Azure Pipelines agent is installed on the machine correctly:
Go back to Deployment Targets in Azure Devops and refresh the page. You should now see that the machine you ran your script on is now added to the Deployment Group by its Computer Name and should be in a Healthy State. In my case shown below I ran an existing script on 2 separate machines here which adds them to the same group:

Create a Release Pipeline
Next in Azure Devops, go to Pipelines > Releases > New and then New Release Pipeline. On the Template selector that shows up, choose Empty Job at the top, then give 'Stage 1' a name if you like, I left mine as the default Stage 1 and closed the right hand panel for this.
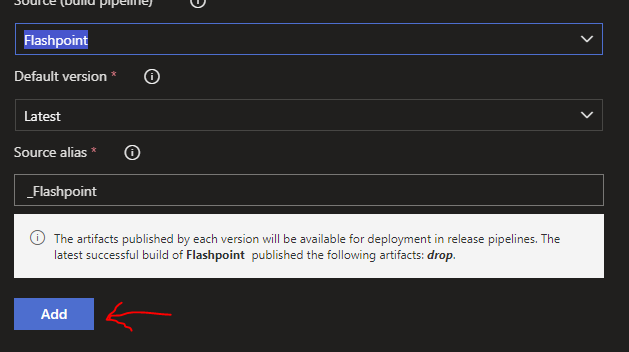
Next, Click on Add Artifact and then select the source of your Artifact. Here we will select the Build Artifact that is now available from our Azure Artifacts that we built previously:

Then click Add:
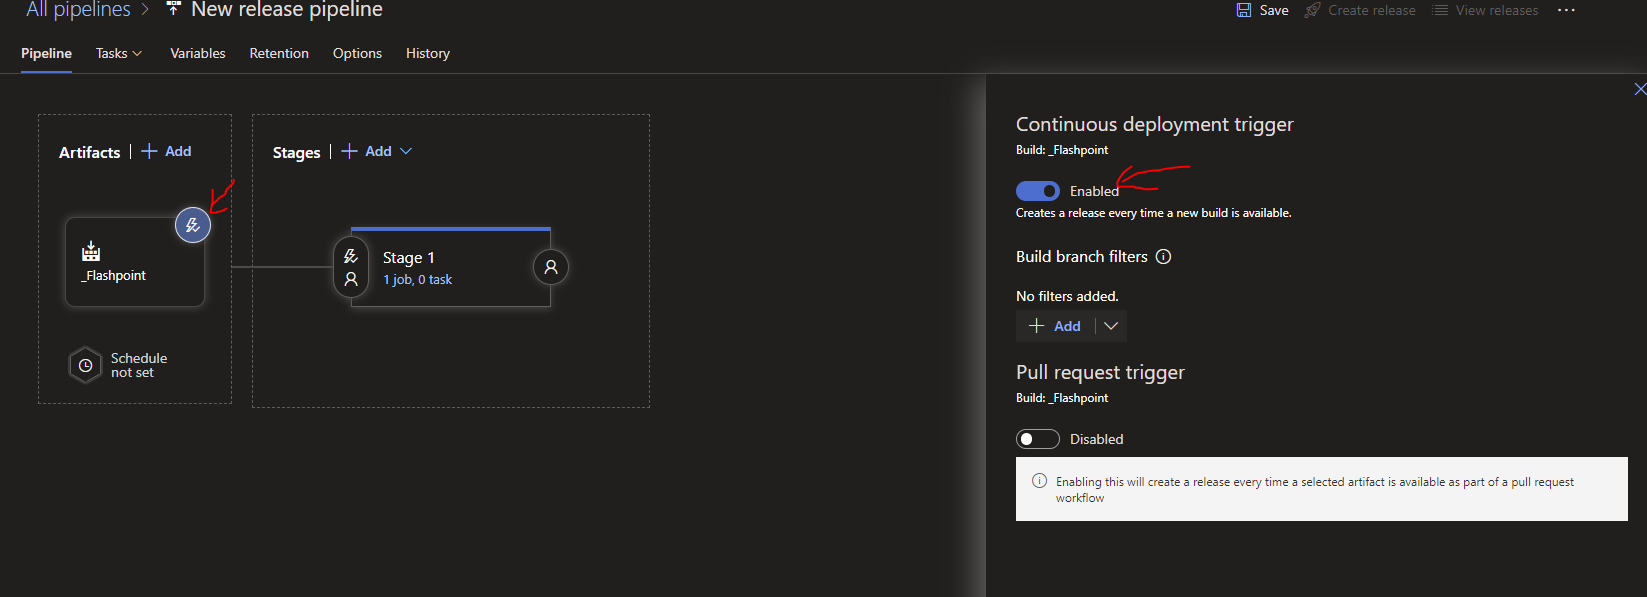
Next (Very Important), make sure to click the Lightning icon on the Artifact just added, then Enable Continuous deployment trigger and click Save then Click OK. Doing this will mean that every time you commit code to your project Repository in Azure Repos and a Build completes successfully, a new Release is automatically created and triggered:
Next, click Tasks > Stage 1:

We are now ready to add the Tasks for the Release pipeline, let's continue.
Add Tasks to the Release Pipeline
In the Tasks page we are now looking at, first click on Agent Job then click on Remove on the right hand side to remove it.
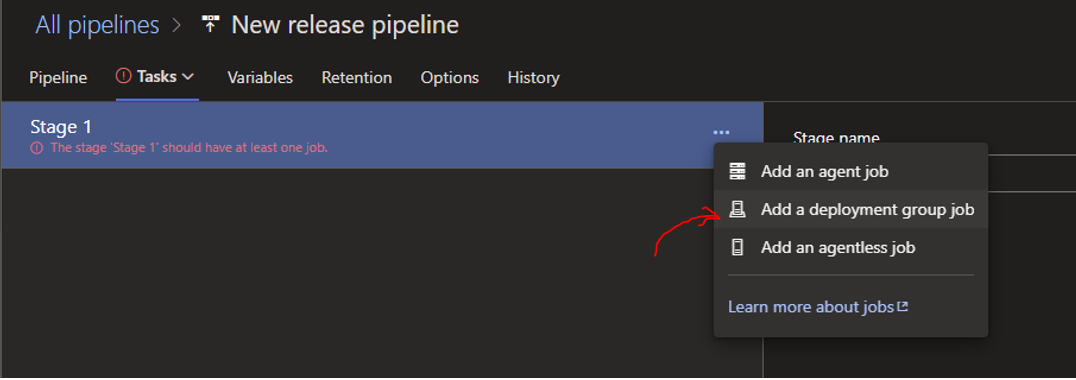
Now click on the ellipsis(3 dots) next to 'Stage 1' (or the name of your deployment process) and add a Deployment group job:
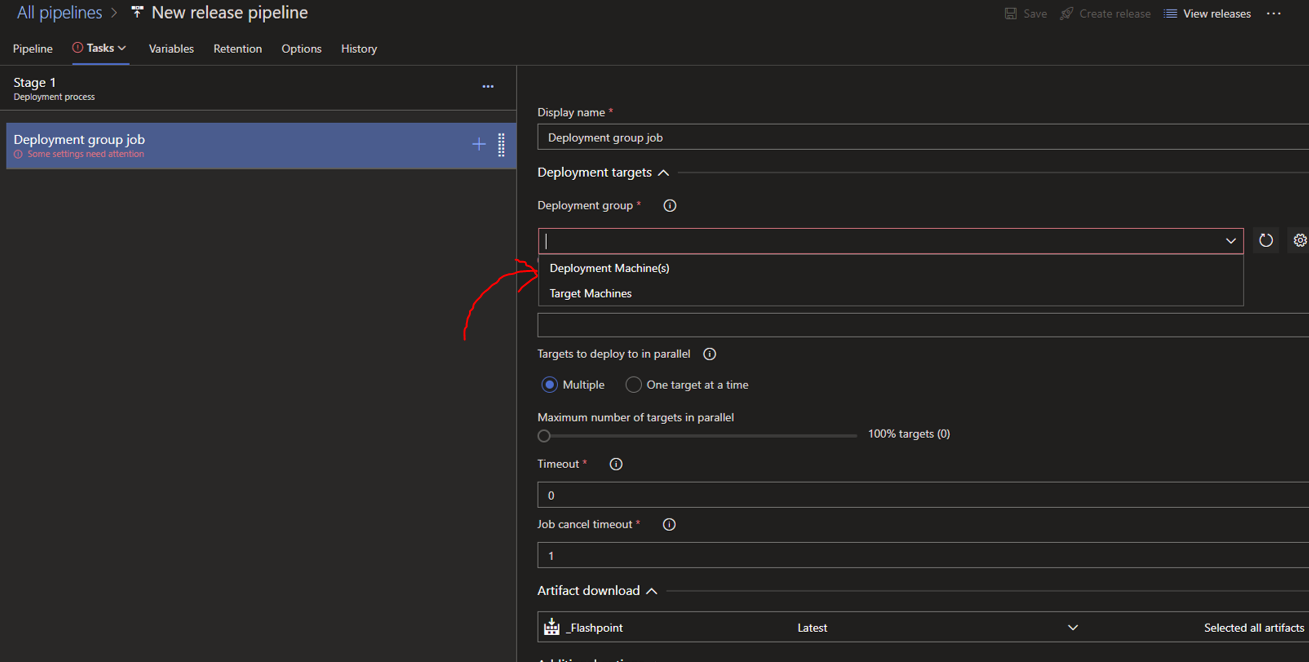
Now on the right hand panel, choose your Deployment group from the dropdown. This deployment group will have registered the target machine(s) that you ran the PowerShell script on:
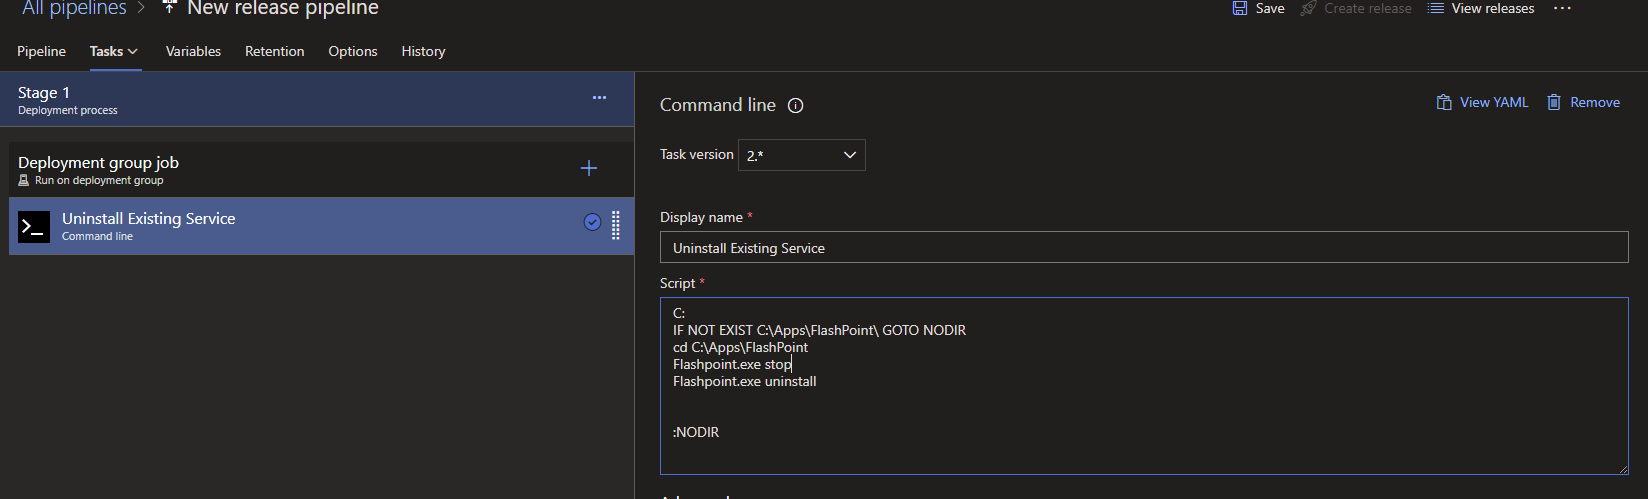
Now click on the + Icon on your Deployment group job, then on the right hand panel, search for CMD and choose Command Line script and add it:

Next, Click on the newly made Command Line Task on the left hand side, and edit its commands and name as follows(the stop and uninstall commands shown assume you are using Topshelf for your Windows Service, you can use another service uninstaller if you like):
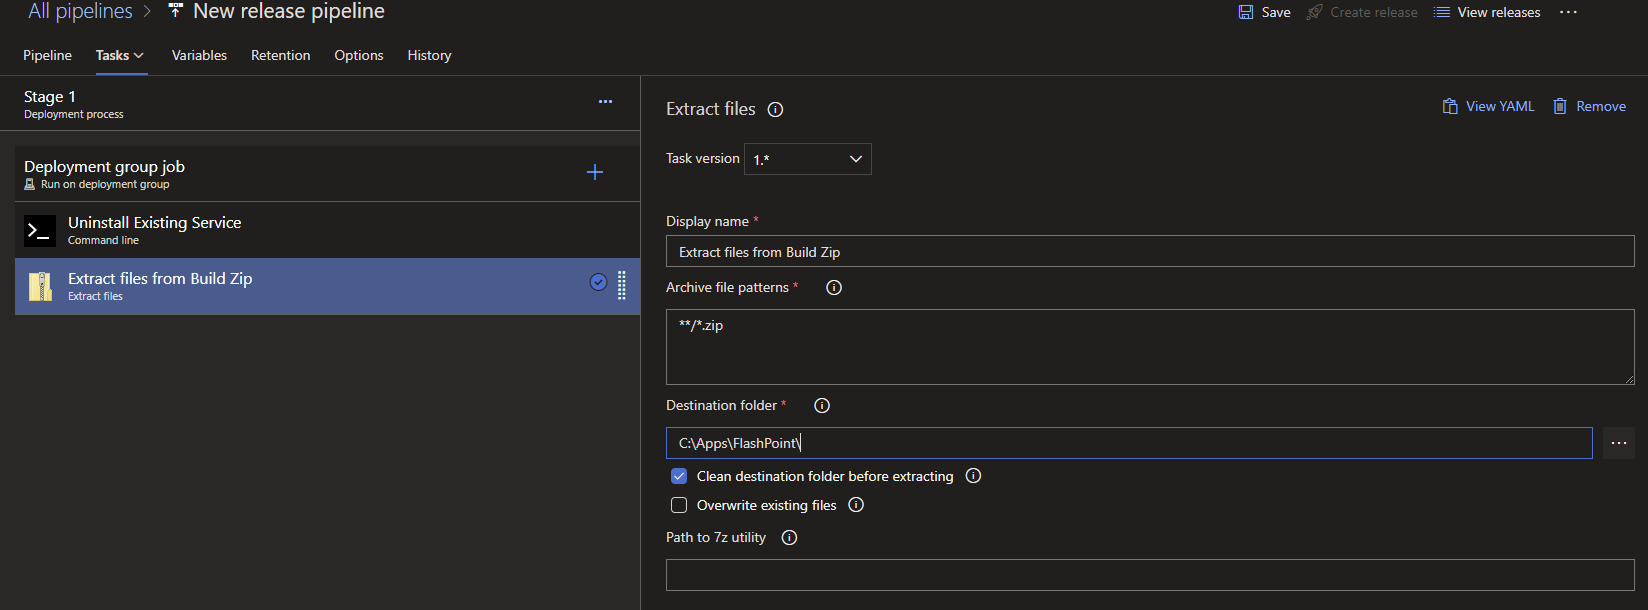
Next add in the step to extract the files from our Build zip. Do this by clicking the + Icon on the Deployment group job again and then search for Extract files and then Add the Extract files Task:
Next, add in another Command Line Task for installing the new service from the + Icon on your Deployment group job:
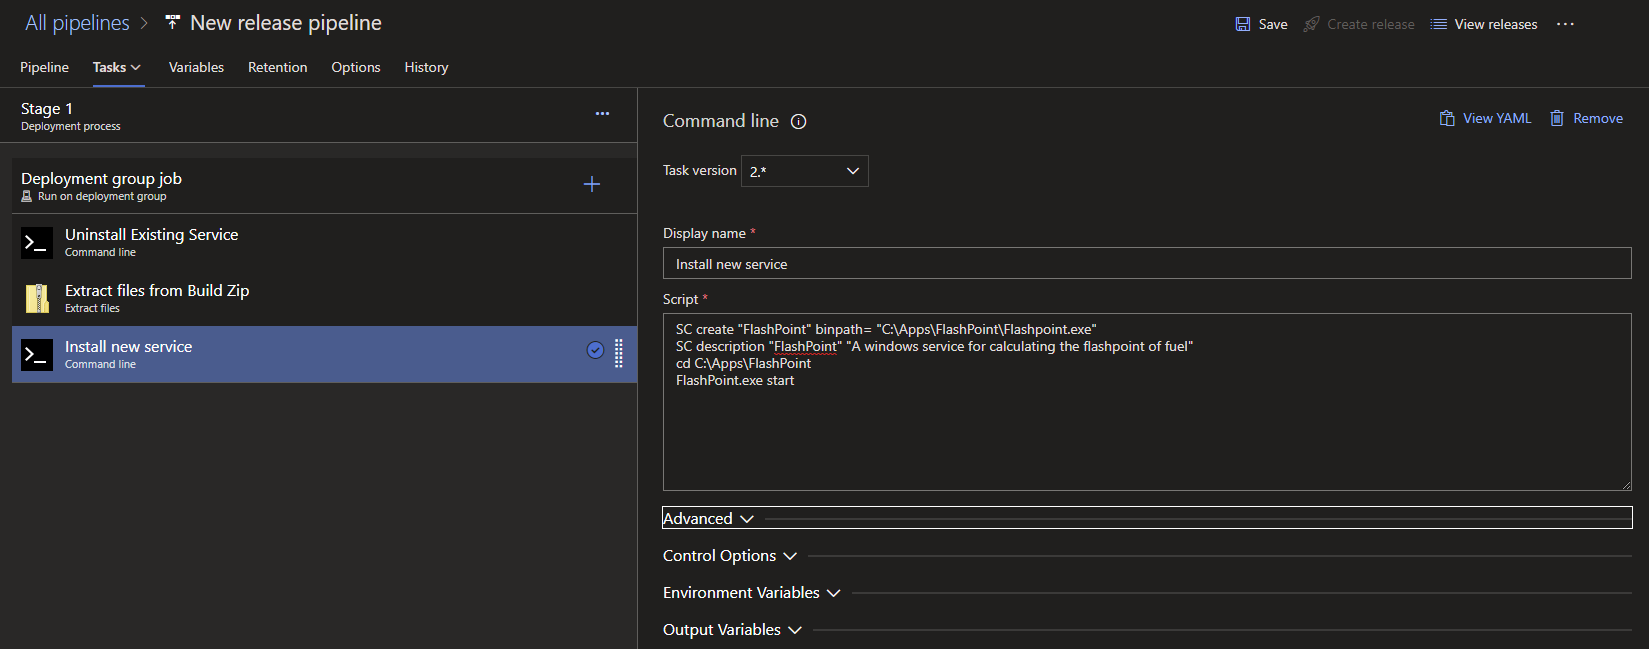
If you need to set a specific Windows Username and password for the service within your "Install new service" step, I also have short and simple guide for that here .
Now Click Save(adding a save comment if you like and click Ok). All our 3 Release Tasks are ready.
Create a Release
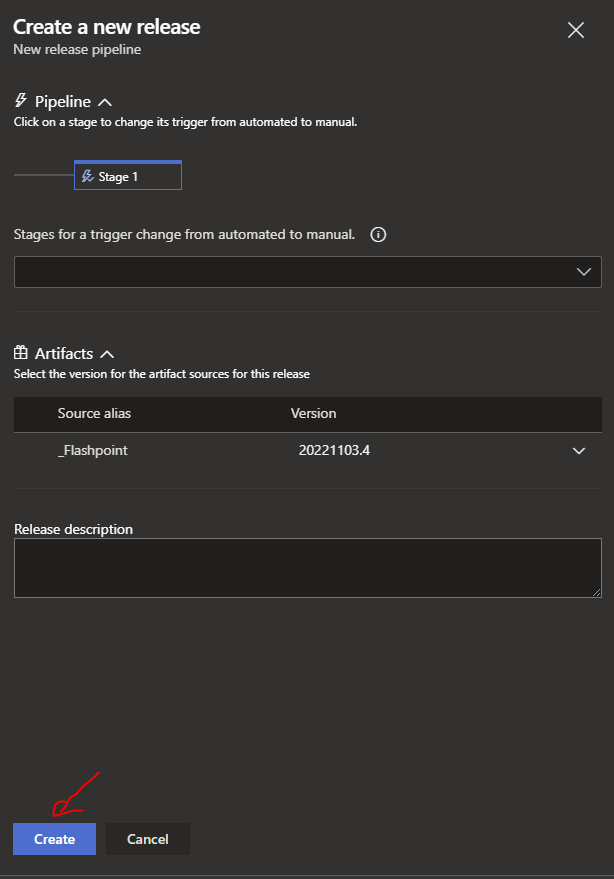
Click on Create Release at the top right of the page, then leave the defaults on the panel that shows after, then Click Create:
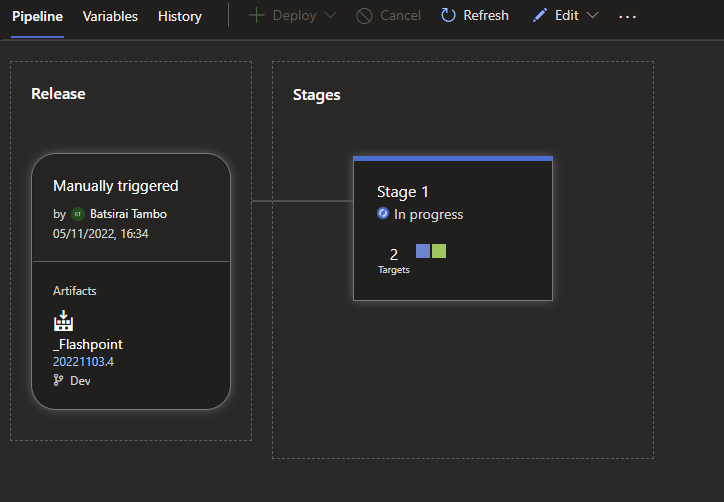
You should now see a link for your release in a green banner (name will be different depending on how many releases you have made):

If you click on your Release link now, you will see the deployment in progress:
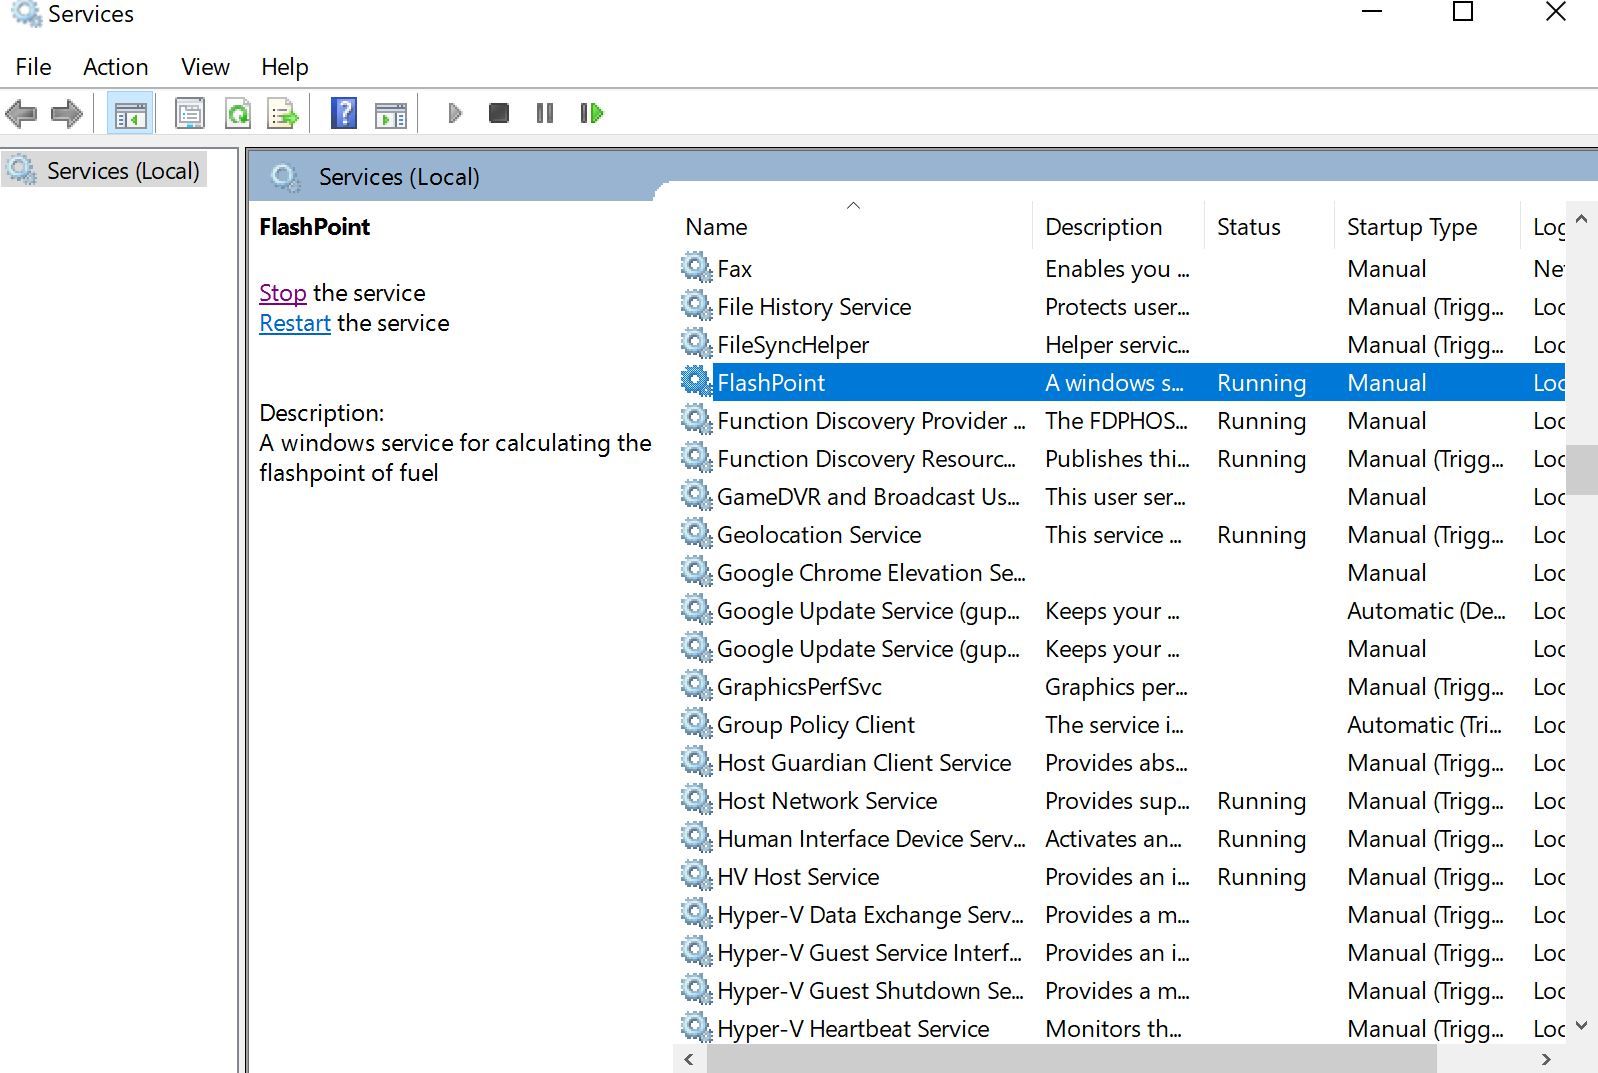
All should succeed and clicking into the deployment Stage (Stage 1) you will see that Azure Devops deployed the Windows Service successfully:
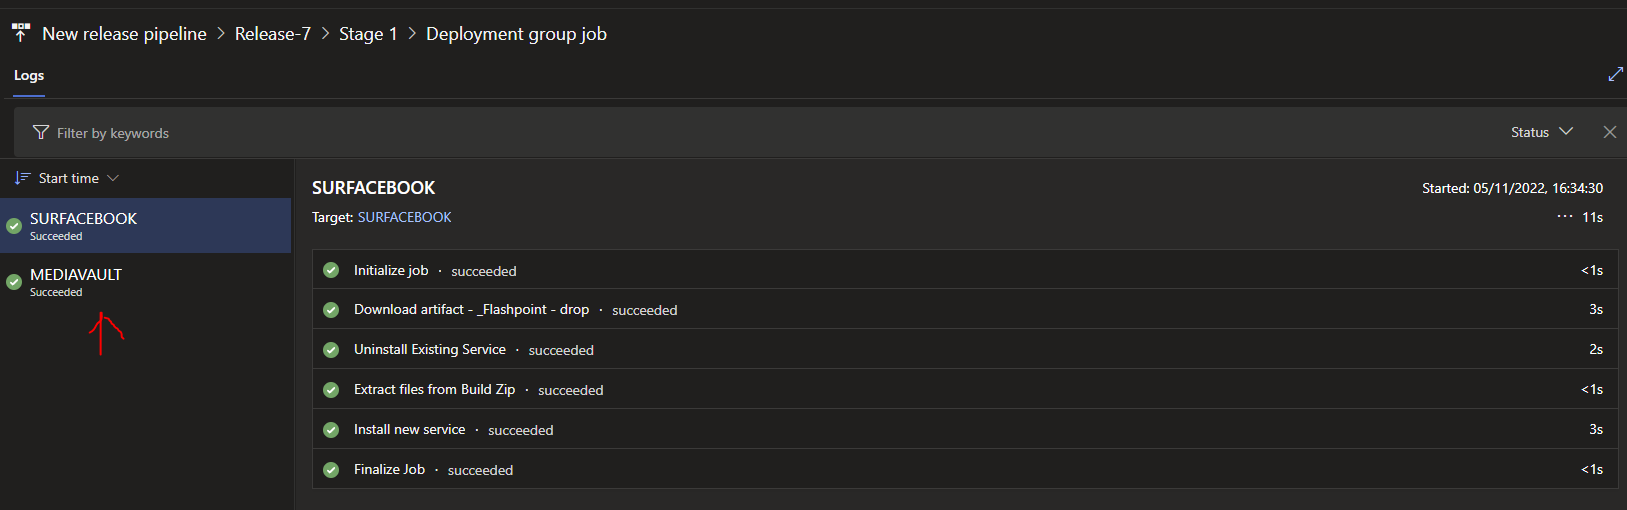
In my case, both on the Surface Book 2 and the MediaVault PC, the Service is installed and Running:
The Holy Grail of Devops (conclusions)
This now means that as you commit new code to your Azure Repo and as new builds are made, new releases can be automatically made for you while you sit back and relax (with all release processes in place of course). A lot of us in the developer community know it is a good idea to setup a CI/CD pipeline for very common apps we have knocking around such as Windows Services...but never get a chance to do it or it feels like a long task to do. I hope this blog post gets you there 😊.
Reference Files for a simple Windows Service
This example Windows Service below uses the .NET8 Desktop Runtime and will need that installed on the target machine, but using .NET7, 6 or 5 will be ok too:
using log4net.Config;
using Topshelf;
using log4net;
using Timer = System.Timers.Timer;

namespace Flashpoint
{
    public class FlashPoint
    {
        private Timer _timer;
        private ILog log;

        public FlashPoint()
        {
            _timer = new Timer(5000) { AutoReset = true };
            _timer.Elapsed += (sender, eventArgs) => Start();
        }
        static void Main(string[] args)
        {
            HostFactory.Run(x =>
            {
                x.Service<FlashPoint>(s => {
                    s.ConstructUsing(x => new FlashPoint());
                    s.WhenStarted(x => x.Start());
                    s.WhenStopped(x => x.Stop());
                });
                x.SetServiceName("FlashPoint");
                x.SetDisplayName("FlashPoint");
                x.SetDescription("A Windows service for calculating the
                flashpoint of diesel.");

                x.RunAsLocalSystem();
                x.StartManually();

            });
        }

        public void Start()
        {
            _timer.Start();
             string path = Directory.GetCurrentDirectory();
            XmlConfigurator.Configure(new FileInfo(Path.Combine(path,
            "log4net.xml")));
            log = LogManager.GetLogger("FileLogger");
            Calculate();
        }
        public void Stop() { _timer.Stop(); }

        public void Calculate(){
            Random rand = new Random();
            int value = rand.Next(14, 170);
            string message = (value >= 14 && value <= 25) ?
            $"minimum Flashpoint, smoking!! ({value}:1)" :
            (value >= 25 && value <= 160) ?
            $"Ideal Air/Fuel ratio ({value}:1)" :
            $"Over-oxidised, use turbo engine ({value}:1)";
            log.Info(message);

        }
    }
}
Flashpoint.cs file (for starting the windows service, stopping it, and calculating a value)
<?xml version="1.0" encoding="utf-8" ?>
<log4net>
	<appender name="console" type="log4net.Appender.ConsoleAppender">
		<layout type="log4net.Layout.PatternLayout">
		</layout>
	</appender>
	<appender name="FileLogger" type="log4net.Appender.RollingFileAppender">
		<file value="C:/Logfiles/logfile.txt" />
		<appendToFile value="true" />
		<rollingStyle value="Size" />
		<datePattern value="yyyyMMdd-HHmm" />
		<maximumFileSize value="10MB" />
		<layout type="log4net.Layout.PatternLayout">
			<conversionPattern value="%date %level %message%newline" />
		</layout>
	</appender>
	<root>
		<level value="ALL" />
		<appender-ref ref="console" />
		<appender-ref ref="FileLogger" />

	</root>
</log4net>
log4net.xml file
<Project Sdk="Microsoft.NET.Sdk">

  <PropertyGroup>
    <OutputType>WinExe</OutputType>
    <TargetFramework>net8.0</TargetFramework>
    <ImplicitUsings>enable</ImplicitUsings>
    <Nullable>enable</Nullable>
  </PropertyGroup>

  <ItemGroup>
    <PackageReference Include="log4net" Version="2.0.15" />
    <PackageReference Include="Topshelf" Version="4.3.0" />
  </ItemGroup>

  <ItemGroup>
    <None Update="log4net.xml">
      <CopyToOutputDirectory>Always</CopyToOutputDirectory>
    </None>
  </ItemGroup>

</Project>
Flashpoint.csproj file