Azure Devops Dependency scanning into Defender for Cloud


Microsoft Defender for Cloud is an observability plane that gives us a high level overview of how our cloud estate (Azure and other public clouds) is operating from a security posture perspective.
One of the main areas of note in Defender for Cloud is the Devops Security section where we are able to see vulnerabilities that live in Nuget packages, npm packages and other dependencies in our Azure Devops Repositories. The point of doing this is to be able to have a high level overview of the state of the Azure Devops Repositories so we can remediate found issues from the source itself, rather than from Defender necessarily.
Flow of Data and Events
The way that Microsoft Defender receives information about your package vulnerabilities is through the following steps:
You have a connected Azure Devops Environment in Azure Portal> Microsoft Defender for Cloud > Devops Security. If you are starting from scratch follow the instructions for the 3 Steps as shown:
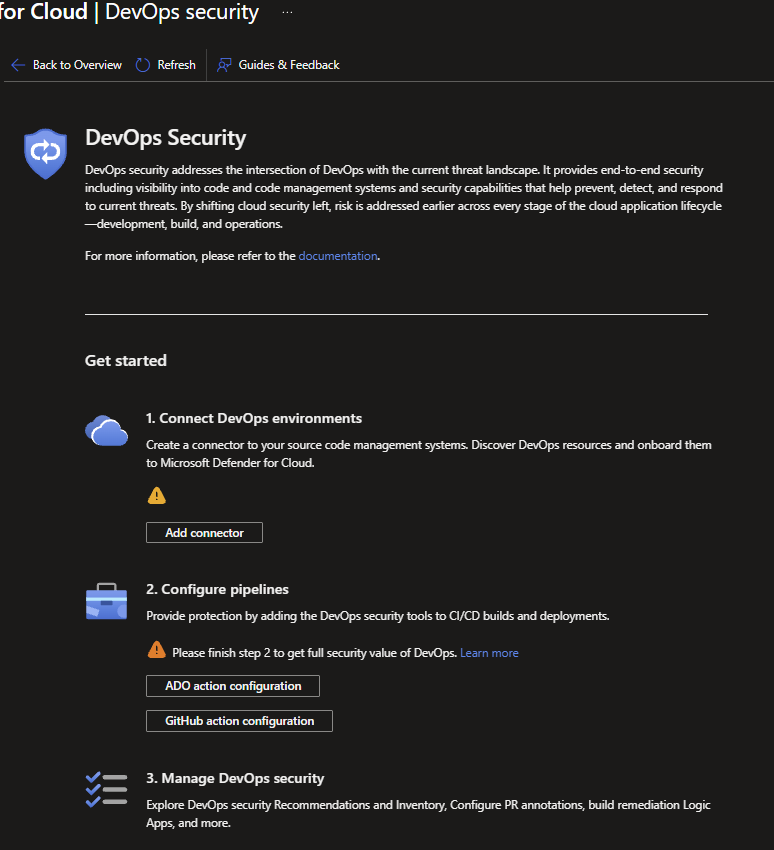
You will have at least one or more Azure Devops Repositories of concern you are looking to scan for vulnerabilities that has an existing Build Pipeline already.
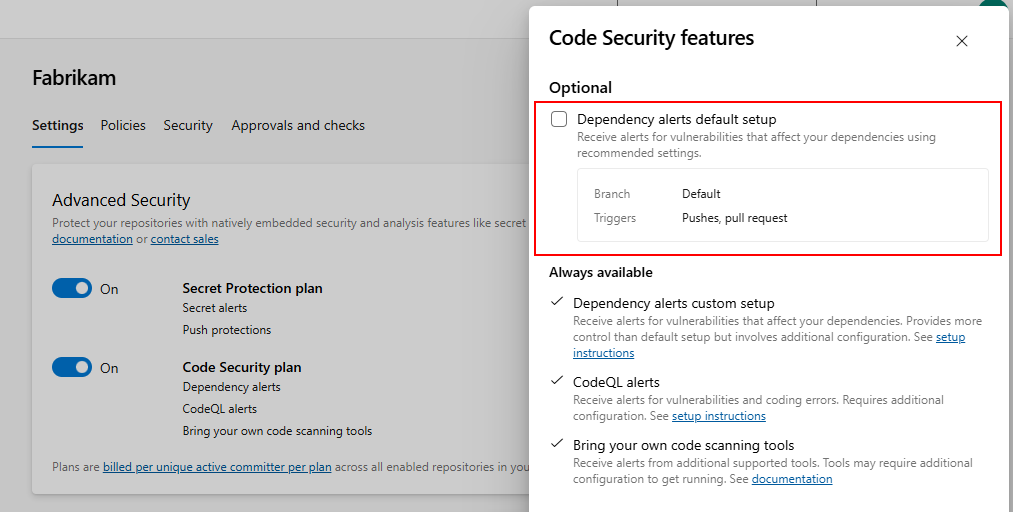
You have Advanced Security turned on for each Repository in Azure Devops under [YourOrganisation] > Project Settings > Repos > [YourRepo] > Advanced Security> Code Security Plan ON (We are not covering Secret Protection plan in this post):
Next, for each repository to be scanned, make sure you have the following 2 Build Pipeline steps added before the last step of the pipeline (you do not need to modify anything, the default is fine):
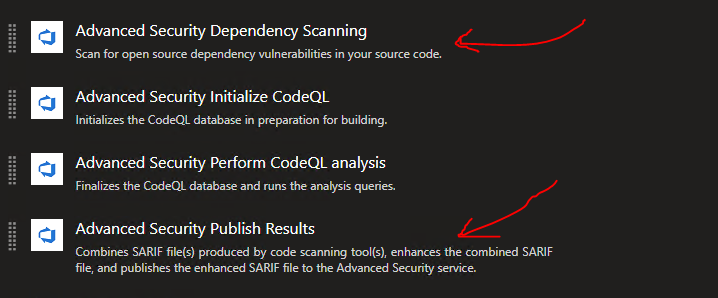
Run a new build on with these steps added in. In .NET Core based projects you may require to add an additional dotnet Restore step because the Advanced Security Dependency Scanning step may need the solution restored to be able to fully scan the dependency.
The 2 steps effectively create and publish SARIF File that can be consumed by Azure Devops and Microsoft Defender for Cloud. Expect Nuget, NPM and Maven dependency issues to be found.
After a successful build, you will be able to first see results in Repos > Advanced Security > Dependencies In Azure Devops showing the found results with an example like this:
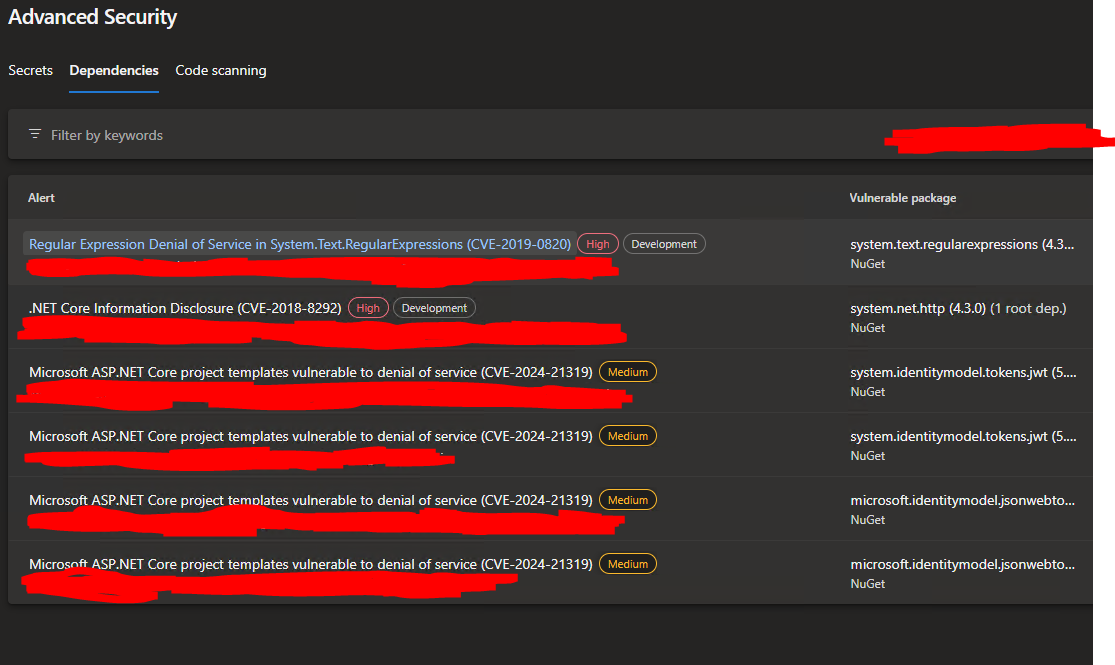
Note that on this screen, you may see duplicative results due to multiple vulnerabilities being discovered out of one package.
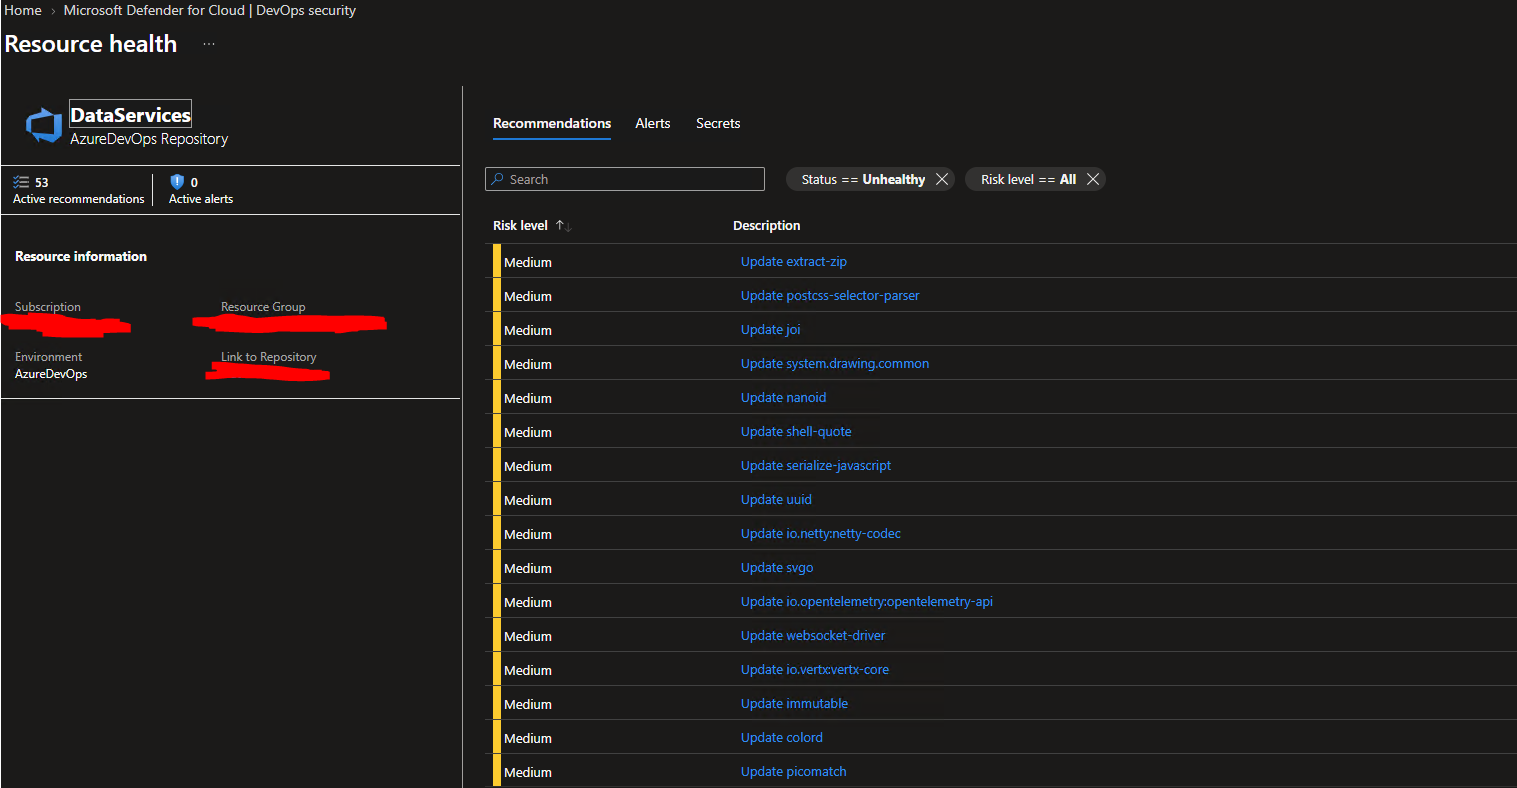
Ultimately, Microsoft Defender for Cloud will pick up these vulnerabilities in the Devops Security for all repositories that you see there with a green tick for Advanced Security. Keep in mind that Microsoft Defender for Cloud's refresh cycle of the current state of vulnerabilities will NOT always be up-to-the-minute fresh. In fact the refresh cycle is 24hrs by default and cannot be changed. Monitor it daily to see changes and the overall health of your Cloud Estate and use Azure Devops for more real-time insights into dependency issues:
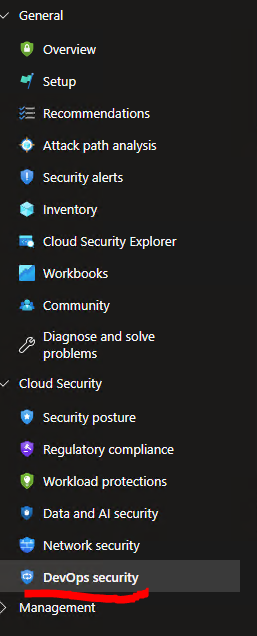
And on clicking through a single repository, you can see the Active Recommendations as they are known in Microsoft Defender for Cloud: